Free Daily Podcast Summary
Beyond the Garden Basics: Daily Summaries Delivered
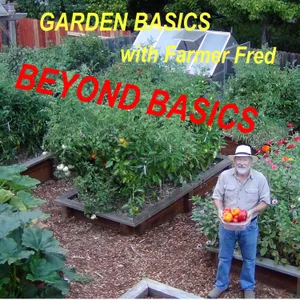
by Farmer Fred
Picking up where the Garden Basics podcast left off.
Latest Episodes
The most recent episodes — sign up to get AI-powered summaries of each one.
- 5 days ago15 min
Too Many Peppers? Try This Popular Sweet Pepper Relish Recipe
In today’s podcast (above), we talk with renowned pepperhead Dave DeWitt, author of several hot pepper books. We talk hot pepper basics, and Dave adds advice on how to overwinter your hot pepper plants for a second year of growth (and heat!). We have a complete, human-corrected transcript of the podcast towards the bottom of today’s newsletter. Short of time? Here are the main points from today’s podcast:* Start from seed for variety, or order early from pepper catalogs. Super-hot varieties like Bhut Jolokia or Scorpion peppers may be difficult to find as transplants, so grow them from seed.* Don’t judge peppers by heat alone. Habaneros hit 80,000–200,000 Scoville units but have a fruity, apricot-like flavor, good for both heat and taste. Diluting them (e.g., one habanero in 4 cups of salsa) keeps flavor without overwhelming heat.* Skip water or beer for pepper burn. Capsaicin isn’t water-soluble, so the relief is temporary and heat returns. Use dairy instead: yogurt, sour cream, heavy cream, whole milk or ice cream (the casein protein strips capsaicin off your mouth).* Never let pepper roots sit in water-logged soil. Add perlite or pumice (not vermiculite) to potting soil/containers to keep roots well-drained and prevent root rot or Phytophthora fungal disease.* Give peppers 10–12 hours of full sun daily. They’re unaffected by day length until fall, and stop flowering once they hit their max fruit load.* Use moderate nitrogen fertilizer. Too much N (especially from urea) produces lots of foliage but few pods. Organic fertilizers (naturally low in salt, under 10% nitrogen) are a safer bet.* Get your soil tested annually (via a University extension service, e.g., Colorado State, UMass/Amherst, Texas A&M, or Utah St) to catch salt buildup, a common yield-killer from repeated watering/fertilizing in raised beds. If salts build up, flood-irrigate the bed heavily at season’s end to flush them out.* To overwinter a pepper plant, grow it in a container, bring it indoors (a south-facing window is enough) over winter, and move it back outside in spring. You’re just keeping it alive in the winter, not expecting fruit until summer returns.* Choose smaller-podded varieties (like pequins) for overwintering success. Pequins retain more vigor in year two, while larger-podded types (like New Mexico chilies) lose vigor and yield less after their first year.What To Do With All Those Peppers This is a public episode. If you'd like to discuss this with other subscribers or get access to bonus episodes, visit gardenbasics.substack.com/subscribe
- 1 weeks ago43 min
The Best Roses For Cut Flowers
Bullet Points from the Podcast, “The Best Roses for Cut Flowers”* Always cut long stems, not just the spent bloom. Snipping only 1-2 inches when deadheading causes the plant to push out short, crooked replacement growth; cutting deep into the cane produces another long stem.* Make cuts just above a five-leaflet leaf (not a three-leaflet one), and choose a node pointing outward from the bush’s center. This improves air circulation and keeps stems growing straight.* Recut stems underwater every couple of days, trimming about an inch off the bottom to remove air bubbles and keep water moving up the stem so buds continue to open.* Strip off any foliage that will sit below the waterline submerged leaves decay and foul the water.* Use flower food, or a sugar-water substitute like regular (non-diet) Sprite or 7Up, to keep water cleaner and nourish cut stems; tap water is otherwise fine.* For low-thorn, long-stemmed cutting roses, favor hybrid teas and grandifloras like Ring of Fire, Hot Princess, Olympiad, Veteran’s Honor, Gold Medal, and Strike It Rich. Many grandifloras have notably fewer prickles.* For reliably long-lasting vase life (opening slowly over about a week), pick Olympiad or Veteran’s Honor rather than Mr. Lincoln, which opens quickly once cut.* For fragrance, choose Mr. Lincoln, Double Delight, or Olivia (an Austin/English shrub rose). But note high-petal-count “cabbage” roses like Olivia and Tamora can shatter petals suddenly (”explode”) on the table.* For multi-bloom stems that fill a vase in one cut, use sprays/floribundas such as Sally Holmes, Julia Child, Betty Boop, and Daybreaker, or miniatures like Joy and Rainbow Sunblaze.* Build arrangements with the “thrill, fill, spill” formula: big roses as the focal thrill, small polyanthus/miniature blooms as fill, and trailing foliage (ferns, ivy, nandina) as the spill to soften the vase edge.* Add a sprig of citrus leaf or rose geranium to boost scent in bouquets from lower-fragrance roses.* To time blooms for a specific event (wedding, show), prune roses about 6-8 weeks in advance. That’s the typical bloom cycle after a hard cut.* Fertilize roughly monthly, especially after a deadheading push, and mulch to help with drought tolerance; if cutting back on water, cut back on fertilizer to avoid burning the plant.* Deadhead regularly and thoroughly; leaving spent blooms on the plant signals it to stop flowering and start forming rose hips instead.* Roses generally suit USDA zones 6-9, with best performance in low-humidity, low-rain, full-sun-but-not-scorching conditions (east-facing exposure helps colors last longer in hot climates).Beyond The Garden Basics is a reader-supported publication. To receive exclusive, new posts and support my work, consider becoming a paid subscriber. Thank You! This is a public episode. If you'd like to discuss this with other subscribers or get access to bonus episodes, visit gardenbasics.substack.com/subscribe
- 1 weeks ago22 min
When Should You Prune Your Blueberries?
I just finished pruning my blueberry plants. In July.WHAT?!? Aren’t you supposed to prune them in the winter?It depends.It depends on where you live, the type of blueberry plant you are growing, and whoever’s advice you want to follow. For the sake of reliability, we concentrate on the advice from University Extension publications from throughout the country in our zone by zone breakdown, below. This is a public episode. If you'd like to discuss this with other subscribers or get access to bonus episodes, visit gardenbasics.substack.com/subscribe
- 2 weeks ago47 min
How to Plant and Care for a Shade Tree
Beyond The Garden Basics is a reader-supported publication. To receive exclusive posts and complete access to past editions , consider becoming a paid subscriber.Today’s podcast interview focuses on consulting arborists and how they help property owners evaluate tree health. Gordon Mann explains that a consulting arborist provides independent inspections, identifies problems such as leaning, branch breakage, bark shedding, root issues, and recommends options for treatment or mitigation rather than only suggesting removal or trimming.But we talked about a lot more regarding shade trees. Among the topics discussed:* Call a consulting arborist (not a tree-care salesperson) every few years for an independent inspection, especially if you notice leaning, breaking branches, or unusual bark shedding. Find one via treesaregood.com (ISA) or asca-consultants.org.* Don’t over-water lawns and starve trees: if you cut lawn irrigation, add dedicated deep watering for trees instead (e.g., a spiral soaker hose or concentric drip rings under mulch) so roots don’t rely on turf runoff.* Water deeply and infrequently (weekly to bi-weekly in dry season), covering the entire root zone from trunk to drip line, not just one emitter at the trunk.* Mulch with wood chips or leaf litter (”duff”), replenished every few years, as a top dressing only, never buried under the tree. It moderates soil temperature/moisture, builds soil biology, and softens rain impact.* Before planting, remove the tree from its container and check for circling roots; prune or score the root ball on four sides (and the bottom) to redirect root growth.* Use the “pedestal method”: dig the planting hole to the height of the root ball (or 1 inch less), keep that pedestal of native, unexcavated soil undisturbed, but loosen a much wider area around it (2–5x the root ball diameter).* Plant slightly high - top of the root ball about 1 inch above grade - to account for settling, and never plant in compost or heavily amended soil that will settle and bury the trunk.* If amending soil, mix in only 8–10% organic matter across the whole dug area rather than replacing native soil entirely.* Space trees for mature canopy size, not instant privacy. Plant further from fences and from each other to avoid crowding, root conflicts, and future removals.* Plant a diverse mix of species (no more than two of the same species in a row) to avoid catastrophic losses from pests/disease like Dutch elm disease or emerald ash borer; include some native trees for a stronger ecological palette.* Learn correct pruning cuts: avoid “heading cuts” (topping/chopping), which cause weak, densely packed regrowth; favor selective, purposeful cuts instead.* Prune only for a specific reason (health, structural safety, or clearance needs). Remove no more than 5–20% of foliage annually, and retire the outdated idea of “thinning” a tree just for looks.* For dead, dying, diseased, or crossing branches, evaluate each case individually rather than removing wholesale. A partial dead branch can sometimes be left for habitat.* Choose the right tree for the right purpose and location up front, accounting for underground utilities and infrastructure, since trees take 15–20+ years to deliver full shade/canopy benefits.* Give young trees a light shake 12–30 inches above the ground; if the root ball shifts, the tree isn’t rooting well and needs root pruning, transplanting, or replanting.Today’s conversation with Consulting Arborist Gordon Mann reminded me of two of the 11 Farmer Fred Garden Rules:7. EVERYTHING YOU KNOW IS WRONG. In the 1940’s & 50’s, DDT was available to home gardeners as a pesticide. Turns out, it caused cancer and killed birds. In the 1960’s-70’s, the Modesto Ash was considered the “perfect shade tree” for the Central Valley of California. Turns out, it is susceptible to anthracnose, mistletoe and is no longer recommended. In the first decade of the 21st century, the pesticides Diazinon and Dursban were taken off store shelves. Also proven ineffective, despite claims to the contrary: Vitamin B-1 for transplant shock, store-bought ladybugs, and tomato calcium spray to cure blossom end rot. In horticulture, research is always ongoing.8. IF IT WORKS FOR YOU, FINE; BUT KEEP AN OPEN MIND. If you’re using safe gardening techniques that others frown upon - and those techniques are working…well, who are we to tell you to stop? Still, new research, techniques or equipment may make your chores a heck of a lot easier and satisfying. Tod
- 3 weeks ago28 min
Home Weather Station Setup for Gardeners
Today’s newsletter podcast is a special treat for readers and listeners of the Beyond the Garden Basics newsletter/podcast who might also be weather nerds…and what gardener isn’t? It’s an interview with climate scientist Daniel Swain, who, besides being a University of California Ag and Natural Resources employee at the California Institute for Water Resources, is well known on social media. Swain runs the Weather West website as well as his frequent presentations talking about extreme weather conditions in California and the west on YouTube, Bluesky, and other social media outlets.The interview focuses on how gardeners can measure weather conditions more accurately in their own yards. We discuss the limits of simple thermometers and the value of weather stations that measure temperature, humidity, wind, rainfall, soil temperature, and other variables, emphasizing that equipment placement is important for getting readings that reflect actual garden conditions.Swain explains that temperature measurements depend heavily on location. A thermometer in direct sun, near asphalt, dirt, or a house wall can read much hotter or colder than the standard shade temperature used by weather services. He says the official comparison temperature is usually taken about two meters (78 inches) above the ground, in shade, and that exposed thermometers can produce misleading highs and lows.The conversation then turns to frost protection in gardens and orchards. Swain says the relevant temperature depends on the plant and its height, because vertical microclimates can differ significantly within a few feet. He explains that cold air can settle near the ground, while higher air may be warmer, and that this matters for citrus, vineyards, tomatoes, and fruit trees. He also notes that irrigation and soil moisture can change daytime and nighttime temperatures.Discussing wind measurement, Swain says rooftop-mounted wind sensors often do not measure ambient wind well because the house creates turbulence and eddies. He explains that spinning-cup anemometers are vulnerable to dirt, rust, and wear, while sonic anemometers have fewer moving parts and can be more reliable. For wind, he recommends placing sensors away from tall obstacles and in open areas.Among the main points in the podcast:* Don’t rely on a thermometer mounted outside your kitchen window; it won’t reflect real conditions in your garden or orchard, which can differ by 6–8°F or more.* Test any temperature sensor in several yard locations before committing to a permanent spot; look for where it runs coldest and where it gets the most sun.* Keep thermometers out of direct sunlight and off dark, heat-absorbing surfaces (asphalt, concrete, bare dirt). These cause false highs by day and false lows at night.* For frost/freeze protection on citrus, hang the sensor at the height you’re actually trying to protect (e.g., ~2 feet, in the canopy shade), not high on a wall or pole.* Remember that a few feet of vertical height can matter more than many feet of horizontal distance, since cold air pools near the ground at night (temperature inversion).* If protecting a ground crop vs. a citrus tree, measure separately near the canopy top and under the canopy. Conditions differ significantly.* Use inexpensive multi-sensor stations (one indoor display, several remote probes) to monitor several yard zones at once rather than a single point.* Consider planting on gentle slopes or hillsides when possible. Cold air drains downhill, giving lower spots more frost risk and slopes a degree or two of protection.* Irrigated soil and plant tissue hold heat longer than dry soil, so damp areas will show a different (often milder) temperature swing than dry ones. Factor this into sensor placement and expectations.* Don’t mount wind gauges (anemometers) on the roofline. House edges create turbulent eddies that produce inaccurate, artificially chaotic wind readings.* For accurate wind data, mount the anemometer on a freestanding pole away from buildings, trees, and other obstacles, as high as practical.* If your station combines wind and temperature sensors in one unit, know that the ideal siting for each conflicts. Consider separating sensors and placing them independently.* Favor sonic anemometers over spinning-cup types if buying new. No moving parts means less error from dust, spiderwebs, or rust, and prices have dropped into the hundreds of dollars.* Clean and periodically recalibrate wind and temperature sensors. Even good instruments degrade and drift with age and grime.* Before designing a garden layout,
- Jun 26, 202637 min
More Heat-Beating Garden Tips
You may recall a couple of weeks ago on June 12, the Beyond the Garden Basics podcast featured myself and America’s Favorite retired horticulture professor, Debbie Flower, talking about protecting your outdoor plants in containers from the searing summer heat. That conversation was recorded during a live presentation at the 2023 Harvest Day festivities, put on by the Sacramento County, California Master Gardeners at the Fair Oaks Horticulture Center.Today’s podcast is the rest of that live presentation, where we discuss tips for saving Time Money and Water in the garden. Meanwhile, in this week’s newsletter, we have more advice for dealing with extreme heat in the garden this summer. This is a public episode. If you'd like to discuss this with other subscribers or get access to bonus episodes, visit gardenbasics.substack.com/subscribe
- Jun 19, 202634 min
Controlling Starthistle, Summer's Most Evil Weed*
Today’s newsletter is all about starthistle, and all the ways you can control this summer weed…organically. If you want to read about chemical controls for starthistle, check out this University of California Ag and Natural Resources publication, “Yellow Starthistle”.In today’s podcast (above), America’s Favorite Retired College Horticulture Professor and I talk about the chemical side of weed control products, including all the different formulations of Roundup that are on the market, but they all have very different tasks; some can even sterilize your soil, making your garden unavailable for weeks, months, - or according to Flower - years. We offer tips for using herbicides, as well. We mention a University of Tennessee Institute of Agriculture publication about the different Roundup formulations entitled, “UPDATE ON ROUNDUP-BRANDED HERBICIDES FOR CONSUMERS” that can help you decide.One national database for insecticide/herbicide/miticide labels is the U.S. Environmental Protection Agency’s webpage, “Pesticide Product and Label System.” It’s not the easiest site to navigate, but be persistent. This is a public episode. If you'd like to discuss this with other subscribers or get access to bonus episodes, visit gardenbasics.substack.com/subscribe
- Jun 12, 202623 min
Your Garden vs. Summer Heatwaves
We tackle how to help your garden cope with the late spring and all-summer heat waves coming our way in today’s podcast and newsletter. In the first part of the podcast (above), America’s Favorite Retired College Horticulture Professor, Debbie Flower, and I, concentrate on helping your plants in containers stay cooler in the summer.The second part of today’s podcast features a September 2022 chat with Sacramento County Master Gardener Gail Pothour, who had specific tips for helping your vegetable plants manage the heat. This is a public episode. If you'd like to discuss this with other subscribers or get access to bonus episodes, visit gardenbasics.substack.com/subscribe
Get Beyond the Garden Basics summaries in your inbox
Free AI-powered daily recaps. Key takeaways, quotes, and mentions — in a 5-minute read.
Get Free Summaries →Free forever for up to 3 podcasts. No credit card required.
You Might Also Like
Listeners also like.

The Beginner's Garden with Jill McSheehy
A practical guide for new gardeners, breaking down gardening basics and terminology to help beginners grow confidently.

The Beet: A Podcast For Plant Lovers
Explores gardening from basics to advanced techniques, featuring expert insights and innovations in plant science and agriculture.
Gardening with the RHS
Seasonal gardening advice from RHS experts, covering planting, design, pest control, and flower show insights for all skill levels.

BBC Gardeners’ World Magazine Podcast
Expert gardening advice, seasonal tips, and global garden travels from BBC Gardeners’ World Magazine.

The joe gardener Show - Organic Gardening - Vegetable Gardening - Expert Garden Advice From Joe Lamp'l
Joe Lamp'l shares practical, organic gardening advice focused on growing food and sustainable practices for gardeners of all skill levels.

Learn Cut Flower Growing | Lessons From a Seasoned Flower Farmer
A seasoned flower farmer shares practical advice and insights on growing and selling cut flowers, from planting to harvest.
Everyday Homesteading
A veteran homesteading couple shares practical methods for growing, cooking, and preserving food for families with limited time.

Black in the Garden
Explores the intersection of Black culture and gardening through conversations about plants, identity, and community.

Pioneering Today Podcast - Homesteading in a Modern World
Homesteading skills like gardening, food preservation, livestock care, and natural remedies for a self-sufficient life in the modern world.

Growing Cut Flowers
Two flower growers share practical tips, expert interviews, and personal experiences to help you cultivate stunning cut flowers.
Gardeners' Question Time
Horticultural experts answer audience gardening questions in weekly live recordings from various locations.

Gardeners' Corner
Weekly gardening advice and insights from across the province, featuring visits to diverse gardens and practical tips for enthusiasts.
About Beyond the Garden Basics
Picking up where the Garden Basics podcast left off.
Customized Recaps
AI-powered recaps with compact key takeaways, quotes, and insights.
Straight to Your Inbox
Get key takeaways from Beyond the Garden Basics in a 5-minute read.
Save Hours Every Week
Stay current on your favorite podcasts without falling behind.
Frequently Asked Questions
What is Podzilla's Beyond the Garden Basics daily summary?
It's a free AI-powered email that summarizes new episodes of Beyond the Garden Basics as soon as they're published. You get the key takeaways, notable quotes, and links & mentions — all in a quick read.
How does the Beyond the Garden Basics podcast summary work?
When a new episode drops, our AI transcribes and analyzes it, then generates a personalized summary tailored to your interests and profession. It's delivered to your inbox every morning.
Is this an official Beyond the Garden Basics product?
No. Podzilla is an independent service that summarizes publicly available podcast content. We're not affiliated with or endorsed by Farmer Fred.
Can I get summaries of other podcasts too?
Absolutely! The free plan covers up to 3 podcasts. Upgrade to Pro for 15, or Premium for 50. Browse our full catalog at /podcasts.
How often does Beyond the Garden Basics release new episodes?
Beyond the Garden Basics publishes weekly. Our AI generates a summary within hours of each new episode.
What topics does Beyond the Garden Basics cover?
Beyond the Garden Basics covers topics including Leisure, Education, How To, Garden, Home & Garden. Our AI identifies the specific themes in each episode and highlights what matters most to you.
Start getting Beyond the Garden Basics summaries tomorrow morning.
Free forever for up to 3 podcasts. No credit card required.
Free forever for up to 3 podcasts. No credit card required.